
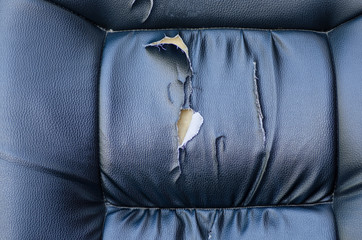
Imagine! You slip into your car, ready to hit the road, and there it is—a noticeable scratch on your once-pristine leather car seat. Whether it’s the result of an accidental key swipe, the claws of an overenthusiastic pet, or just the wear and tear of time, a damaged leather seat can be a source of frustration.
But fear not! With the proper knowledge and a bit of elbow grease, you can restore your leather car seats to their former glory.
In this DIY guide, we’ll delve into ten detailed ways to repair leather car seats, empowering you to take matters into your own hands and bring back the luxurious allure of your vehicle’s interior.
1. Assessing the Damage: Unveiling the Story of Your Leather Seats
Before diving into repairs, take a close look at the damage. Identify scratches, cracks, or discolouration. Understanding the extent of the issues will guide your repair approach. Minor scratches only need a touch-up, while larger cracks may require more intensive interventions. This initial inspection sets the stage for a targeted and effective repair strategy, ensuring you address each issue with precision.
2. Gentle Cleansing: A Spa Day for Your Leather Seats

Begin the repair process by giving your leather seats a thorough cleaning. Use a mild leather cleaner to remove dirt, grime, and any surface contaminants. A clean surface ensures that repair products adhere effectively. Gently massage the cleaner into the leather using a soft-bristled brush or a clean cloth. This gentle cleansing not only prepares the leather for repair but also enhances its overall appearance, setting the foundation for a successful restoration.
3. Moisturizing Magic: Conditioning for Resilient Leather
Once cleaned, treat your leather seats to a moisturizing conditioner. Leather, like skin, benefits from hydration to maintain its suppleness and resist cracking. Always go for a high-quality leather conditioner and apply it evenly across the seats. Allow it to be absorbed, giving your leather a refreshing spa treatment. This moisturizing magic not only repairs existing damage but also serves as a preventive measure against future wear and tear.
4. Filling in the Gaps: Repairing Small Scratches and Scuffs
For minor scratches and scuffs, a leather repair kit can work wonders. These kits typically contain a colour-matched filler or adhesive that seamlessly blends with your car’s interior. Gently apply the filler using a small spatula or your fingertip, ensuring it covers the damaged area. Once dried, it can be sanded and polished for a smooth finish. This meticulous filling process transforms minor imperfections, leaving your leather seats looking as good as new.
5. Color Match Mastery: Blending Tints for Seamless Results
When dealing with scratches or discolouration, accurately matching the colour of your leather is crucial. Invest in a leather dye or colour-matching kit designed for automotive use. Before applying the colour to the damaged areas, test it in an unnoticeable location. Apply the dye in thin layers, allowing each coat to dry for a flawless integration. This colour match mastery ensures that the repaired areas seamlessly blend with the original leather, creating a uniform and aesthetically pleasing finish.
6. Patching Large Cracks: A Stitch in Time
For more substantial cracks or tears, consider using a leather repair patch. These patches often come with adhesive backing for easy application. Cut the patch to fit the damaged area, ensuring it overlaps the edges for a secure bond. Press it firmly onto the damaged spot, and voila—a patched-up leather seat ready for action. This patching technique not only addresses more significant issues but also adds a layer of durability to the repaired section.
7. Mastering the Art of Leather Painting: Customizing with Flair
Leather paint offers a creative solution for customizing or refreshing your car seats. Choose high-quality leather paint in the desired colour. Prep the leather by cleaning and lightly sanding it. Apply the paint on thin, even coats, and this enables each layer to dry completely before applying the next. This method will allow you to express your style while concealing imperfections. Mastering the art of leather painting transforms your seats into personalized works of automotive art.
8. Cracking the Code: Addressing Deep Creases and Wrinkles
Deep creases or wrinkles in leather seats can be challenging to address. Employ a leather conditioner with a revitalizing formula designed to soften and relax the leather fibres. Massage the conditioner into the affected areas, gently stretching and working the leather. This process helps reduce the appearance of deep creases, restoring a smoother surface. By cracking the code of deep creases, you ensure that your leather seats regain their original lustre and comfort.
9. Seeking Professional Help: Knowing When to Call the Experts

While many leather seat repairs can be done at home, some situations may warrant professional intervention. If the damage is extensive or if you’re uncertain about the repair process, consulting with a professional leather repair service is a wise choice. They have the expertise and tools to handle intricate repairs, ensuring a polished and lasting result. Knowing when to seek professional help guarantees that your leather seats receive the care and attention they deserve.
10. Preventive Care: Shielding Your Leather for the Long Haul
Once your leather seats are restored, implement preventive measures to keep them in top condition. To avoid further damage, clean and condition the leather on a regular basis. Consider using seat covers or parking in shaded areas to shield your car’s interior from the harsh sun. With proper care, your leather seats can maintain their allure for years to come. Implementing preventive care practices safeguards your investment, ensuring that your leather seats remain in pristine condition for the long haul.
The Bottom Note!
Repairing leather car seats is not just about fixing visible flaws; it’s a journey to preserve the elegance and comfort of your vehicle’s interior. Armed with these DIY techniques, you can take charge of the restoration process, transforming your car seats and, in turn, enhancing your overall driving experience.
So, roll up your sleeves, get your repair equipment, and set off on the adventure of restoring your leather car seats—one scratch, scuff, or crease at a time. Your car deserves the best, and with a bit of work, you can restore its appearance and feel.


GIPHY App Key not set. Please check settings